How to Customize Your Settings in Workflows

Ryan Alex
Last Update 3 years ago
Learn how to customize your Workflow Settings here:
- Navigate to the Settings tab within the Workflow Builder.
- Here you'll see a list of customizable settings.
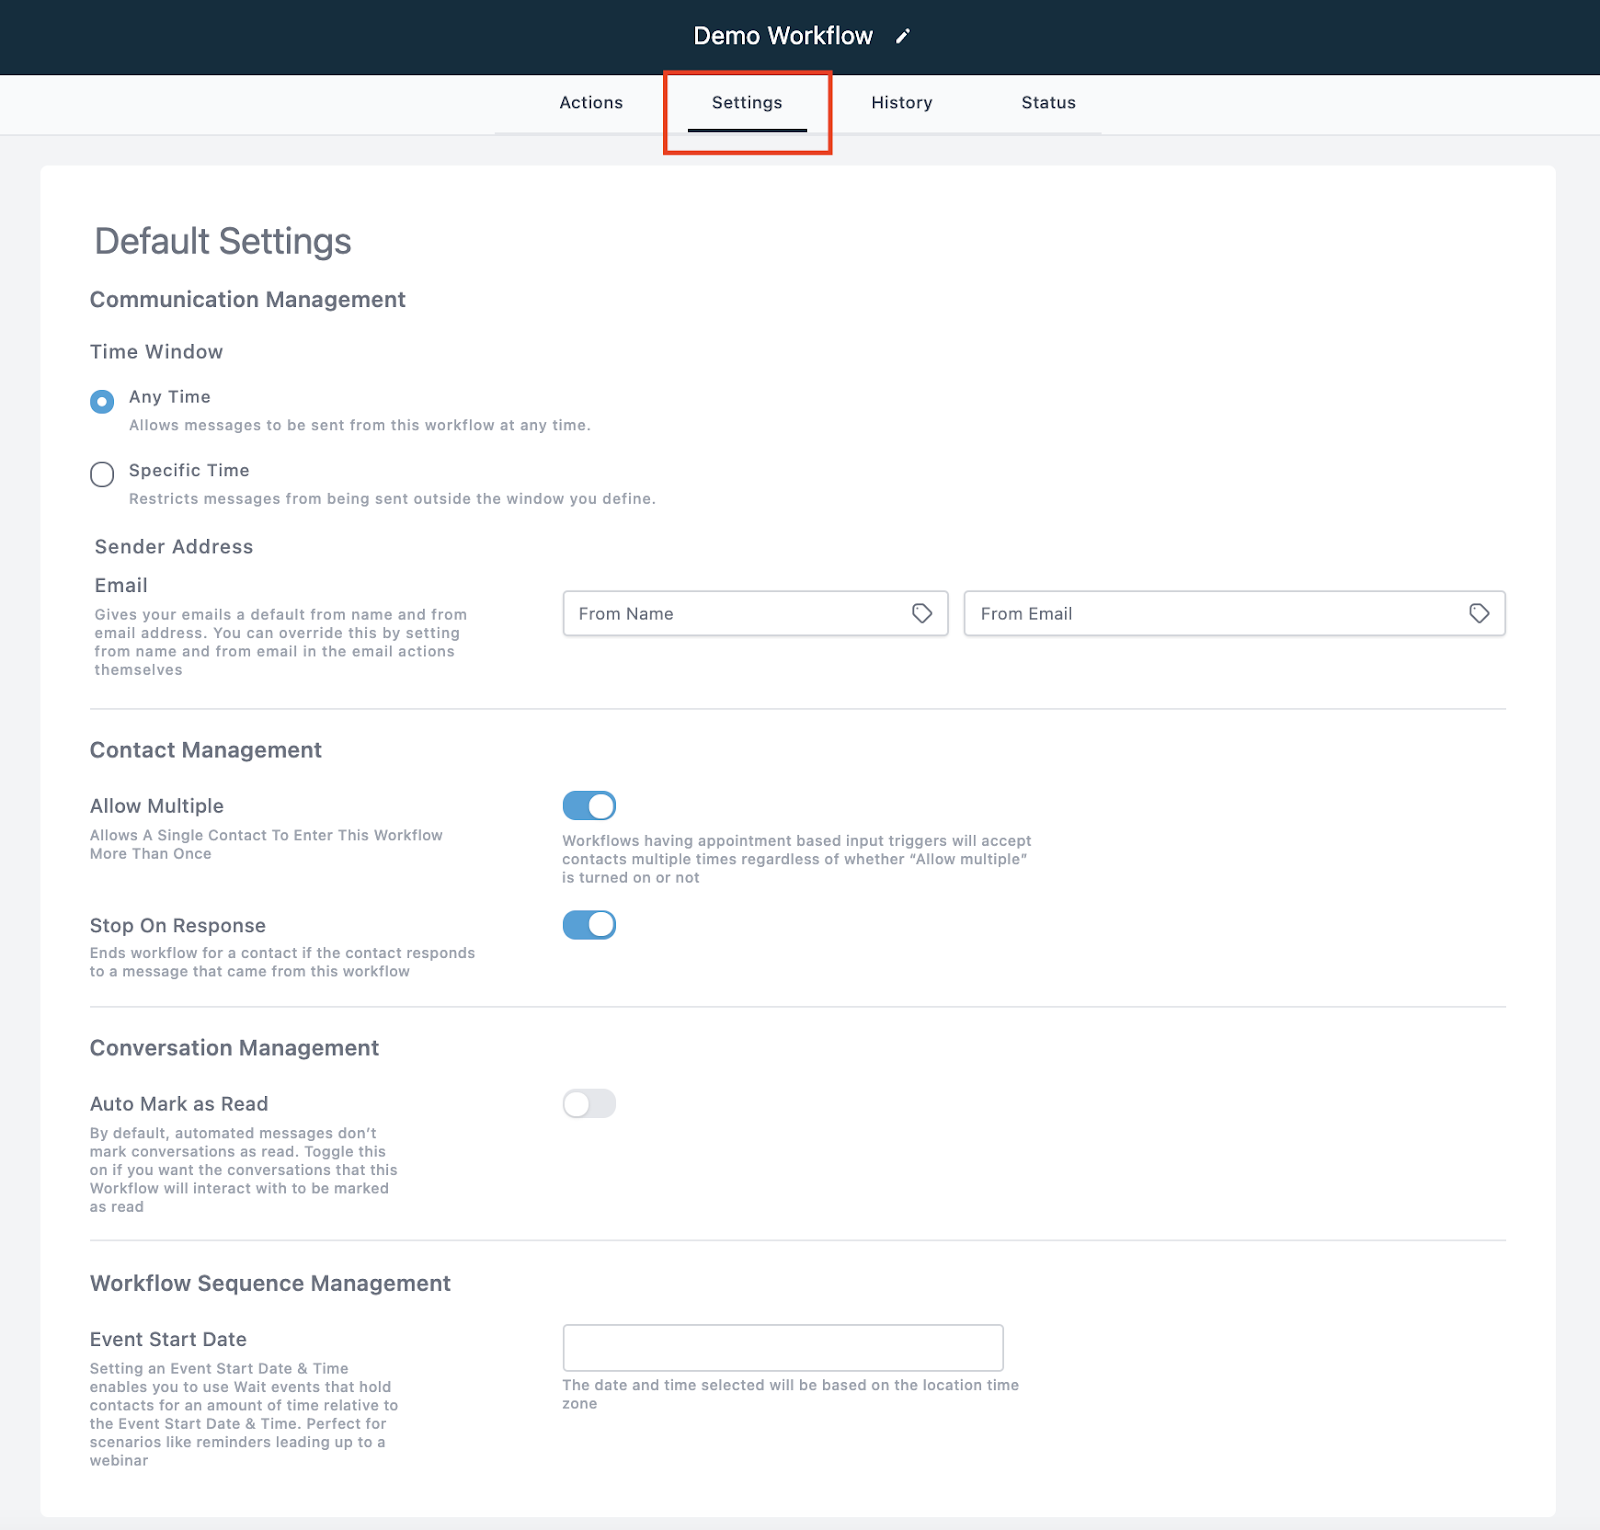
- Choose a sending window.
- If you select Any Time, the workflow will occur anytime someone is added.
- If you select Specific Times, you can customize days and times.
- Sender Address allows you to choose a specific "From" name and email.
- Allow Multiple can be toggled off or on.
- If on, the same contact can enter the same workflow multiple times.
- Stop on Response can be toggled off or on.
- If on, a specific response can trigger the workflow end. For example, if you’re using a lead nurture workflow and someone books an appointment, you wouldn’t want to keep sending them communications to book an appointment.
- Auto Mark as Read can be toggled off or on.
- If on, conversations will show up in the ALL tab, as read, vs. being Unread.
- Event Start Date can be customized, if the workflow is built around a specific event, like a webinar with a specific date/time.